
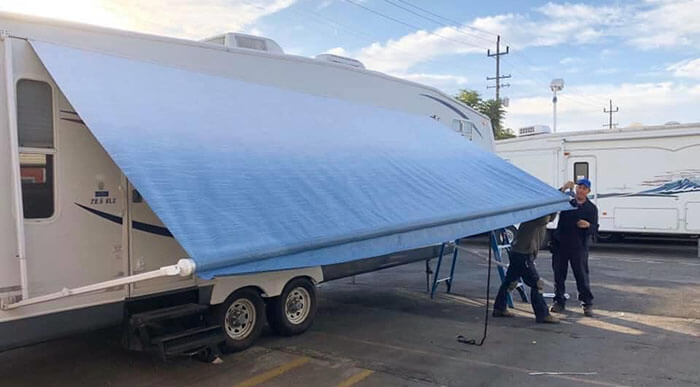
Dometic slide toppers are a great way to improve your RV camping experience. Not only do they provide shade and protection from the elements, but they can also help keep your RV cooler in the summer months. If you’re having trouble getting your slide topper to fit just right, don’t worry – we’re here to help. In this article, I will show you how to adjust a Dometic slide topper for a perfect fit. Let’s get started!
Why do you use an RV slide topper?

There are many reasons why you might want to use an RV slide topper. For one, they can help keep your RV cooler in hot weather. They can also provide shade and protection from the elements, which can be especially useful if you’re camping in an area with a lot of sun exposure. Additionally, slide toppers can help prevent water and debris from getting into your RV when the slide is open.
Where do I place the slide topper?
When you’re ready to install your slide topper, the first thing you’ll need to do is decide where you want it to go. You’ll want to place it so that it covers the entire length of the slide, from front to back. Additionally, you’ll want to make sure that the topper is centered on the slide. Once you’ve decided on the placement, you can mark the spot with a pencil or pen.
What’s I need to install the slide topper?
Installing a slide topper is a relatively simple process, before you begin the installation process, you’ll need to gather a few supplies.
You’ll need a tape measure, a drill, screws, a screwdriver, washers, and some basic hand tools. Additionally, you’ll need the brackets that came with your slide topper. If you don’t have the brackets, you can purchase them at most hardware stores.
How do I install the slide topper? step by step
Now that you know where to place the topper, it’s time to install it. Begin by removing the old one, if there is one. To do this, simply unscrew the brackets that hold it in place. Once the old topper is removed, you can start installing the new one.
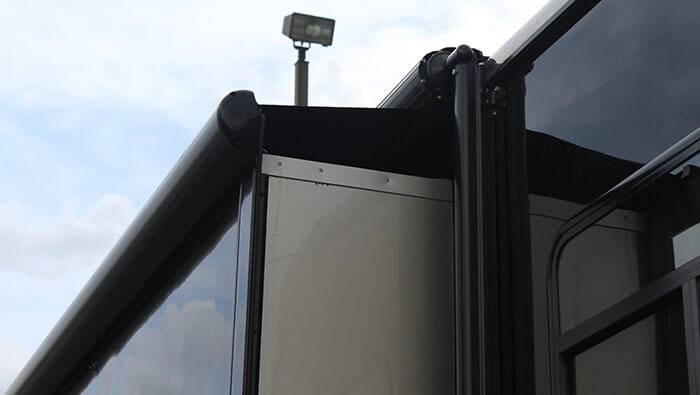
Step 1: Install the awning rail
The first step is to install the awning rail. This is the strip of metal that the topper will attach to. To do this, simply hold the rail in place and use screws to attach it to the RV. Make sure that the rail is level before proceeding to the next step.
Step 2: Attach the topper fabric
Once the awning rail is installed, you can start attaching the topper fabric. Begin by unrolling the fabric and placing it over the rail. Then, use the provided clips to attach them to the rail. Make sure that the fabric is tight and free of wrinkles before proceeding to the next step.
Step 3: Install the brackets
The next step is to install the brackets. These will hold the topper in place and allow you to adjust it if necessary. To install the brackets, simply hold them in place and use screws to attach them to the RV.
Step 4: Adjust the topper
Now that the topper is installed, you can adjust it to get the perfect fit. To do this, simply loosen or tighten the screws on the brackets. Once you’re happy with the fit, tighten the screws to secure the topper in place.
How to Adjust a Dometic Slide Topper
If you’re not happy with the fit of your Dometic slide topper, don’t worry – it’s easy to adjust. In most cases, you’ll just need to loosen or tighten the tension straps that hold the topper in place. To do this, you’ll need a Phillips head screwdriver.
Once you have your screwdriver, locate the tension straps on the underside of the topper. There will be two straps – one on each side of the topper. Use your screwdriver to loosen or tighten the strap as needed. If you’re having trouble getting the straps tight enough, try adding a few more wraps around the bar.
Once you’ve adjusted the tension straps, open and close the slide to test the fit. If it’s still not quite right, repeat the process until you’re happy with the results.
And that’s all there is to it! Adjusting a Dometic slide topper is easy, and it only takes a few minutes to do. So if you’re not happy with the fit of your topper, don’t hesitate to make the necessary adjustments. Your RV will thank you for it.
Why slider topper need perfect adjustment?
There are a few reasons why you might need to adjust your slide topper. First, if the topper is too loose, it can flap in the wind and make noise. Additionally, a loose topper can allow water and debris to get into your RV when the slide is open.
Another reason to adjust the topper is if it’s not fitting snugly against the side of the RV. This can create a gap that lets in light and can be a security risk.
Finally, you may need to adjust the topper if it’s not lining up correctly with the slide. This can cause the topper to rub against the slide, which can damage both the topper and the slide.
All of these reasons underscore the importance of having a well-adjusted slide topper. By taking the time to adjust yours, you can avoid all of these problems. So if you’re not happy with the fit of your topper, don’t hesitate to make the necessary adjustments. Your RV will thank you for it.
Conclusion:
In conclusion, it’s important to adjust your slide topper to get the perfect fit. A well-adjusted topper will look better, last longer, and provide a better seal against the elements. So if you’re not happy with the fit of your topper, don’t hesitate to make the necessary adjustments. In most cases, you’ll just need to loosen or tighten the tension straps that hold the topper in place. To do this, you’ll need a Phillips head screwdriver.

Hi I’m Joiel Borid Creators of RV Outsider. Wild Life’s first camping was started when I’m 8 years old, at the Home Front Yard. Moto of RV Outsider shares my experience, expertise, and knowledge that I learned, and apprises about my next journey. So stay tuned with RV Outsider.